We’re Cooking Again – An Old Time Recipe From My Grandma

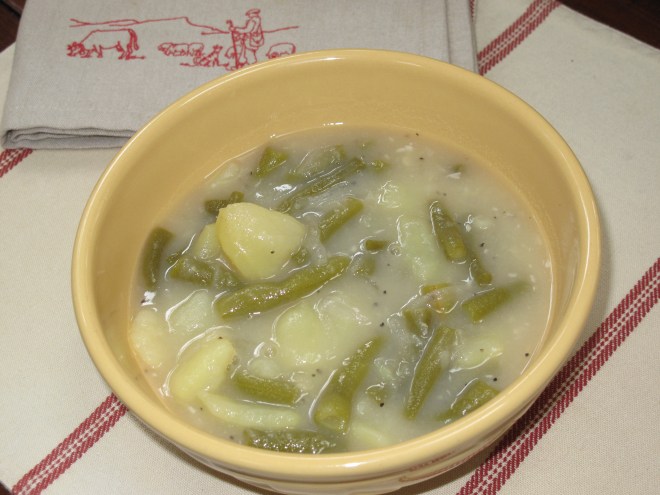
We’ve had a bumper crop of green beans here on Glen Road and I have been thinking about a green bean soup recipe that my Grandma used to make from as far back as I can remember.  The problem was that I didn’t have the recipe and I would never be able to make the soup from memory.  So I had my mom and aunt confer and get back to me on how to make this old-time soup just like my Grandma used to make it.  There are a number of foods that I remember from when I was young and this soup was one of them.  I know to many that the idea of a green bean soup will not sound too appetizing.  However, when you add thinly sliced onions, cubed potatoes and a garlic-laced roux, you end up with a slightly thick green bean stew with lots of flavor.  My recipe is for a double batch.  Some to eat now and some to freeze for later this Fall when soups just seem to taste better.  So if you have a late season green bean harvest and don’t know what to do with them, why not give my Grandma’s green bean soup a try.  It starts with some fresh green beans:

Ingredients:

  • 4 to 5 cups of fresh green beans (cleaned and snapped into 1″ pieces)
  • 4 to 5 large potatoes (cleaned, peeled and cut into cubes.  I used Yukon Gold potatoes.)
  • 1 medium yellow onion (thinly sliced.  A mandolin works perfect.  We are onion lovers so feel free to use less onion if you wish.)
  • 6 tablespoons of flour
  • 6 tablespoons of melted butter (let the butter cool slightly before using)
  • 6 to 7 cloves of garlic
  • Salt and fresh pepper to taste

Directions:

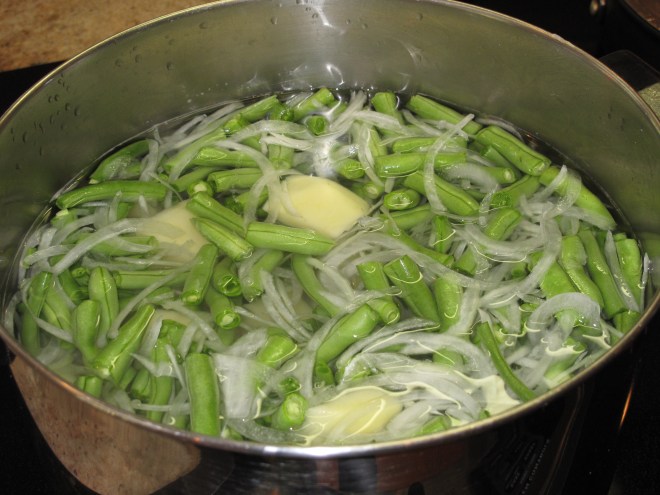
Place green beans, potatoes and onion into a stock pot and cover with water.  Add enough water to cover all the vegetables.  Place on medium heat and boil until the vegetables are tender.

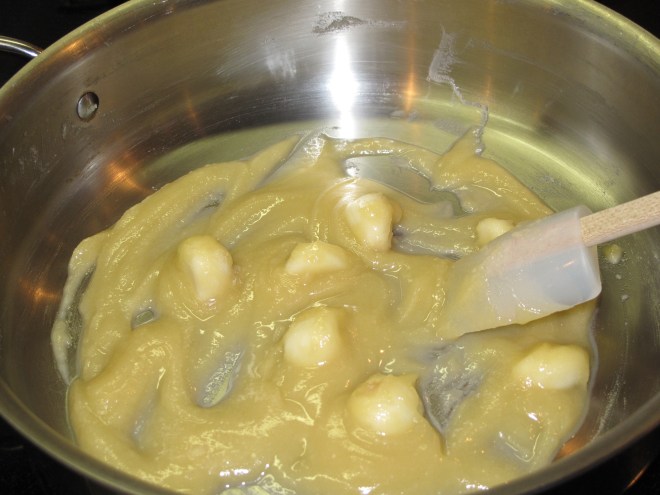
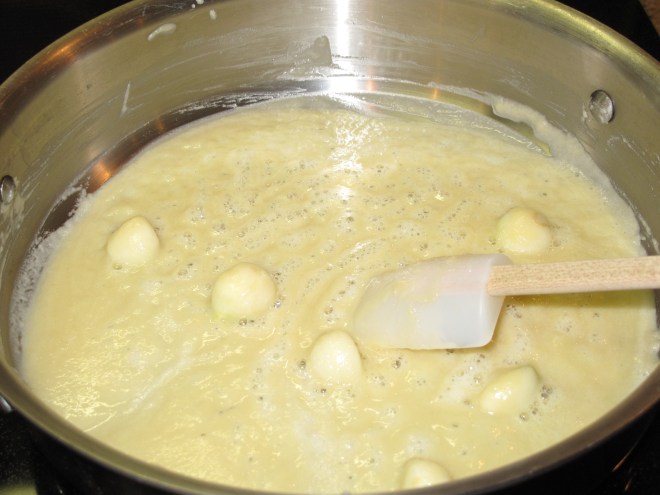
While the vegetables are boiling, start to make the roux.  Just the word “roux” makes most people think of some fancy cooking routine that takes a lot of time and patience.  Don’t let the word fool you.  A roux is nothing but a cooked mixture of flour and a cooking fat, like butter or vegetable oil, that is used to thicken sauces, soups and gravies.  A couple of things on the roux for this soup:  first, you want to cook the roux until it turns a deep golden brown.  Second, keep the garlic in the pan until it starts to brown and then remove it.  If you leave the garlic in too long and it burns, it will ruin the flavor of your roux.  Last, mix the flour and cooled, melted butter in the pan until well combined and then add the whole garlic cloves before turning the stove heat on.  Here are a few pictures showing how the roux will progress.

The beginning–the flour and cooled, melted butter combined and then the garlic cloves added before turning up the heat:

The middle–the roux is now more sauce-like and lightly simmering:

The end–when the roux is a deep golden brown, take it off the heat and let it cool a bit before you add it to the vegetable mixture.  Note that the garlic cloves are gone.  Again, make sure to remove them when they begin to brown.  If they burn, your roux will not be good and you will need to start over.

Once your vegetables are tender, add the roux into the vegetable pot and stir the roux until it combines with the water.  Once combined, add plenty of salt and pepper.  Taste buds vary, so add until you are satisfied.  I tend to add more, versus less, salt and pepper.  For me, it’s around 1 tablespoon of salt and about three teaspoons of pepper.  Remove the pot from the heat and let the soup sit for a few hours.  This is one of those dishes that is better the longer you wait to eat it.  Letting the soup sit for several hours or overnight in the refrigerator allows the flavors to combine.  When ready to eat, place the pot back on the burner and simmer until hot.  Ensure that the salt and pepper levels are adequate.  Serve it any way you like.  In our house, we eat just the soup with some fresh bread or rolls.  Any way you serve it, this hot and hearty soup is one that pleases.  At least it has in my family for almost a century.  Enjoy!!

Restaurant Field Trip – The Whelk

Last year at about this time, we visited Le Farm restaurant in Westport, CT.  The restaurant’s owner and head chef, Bill Taibe, is one of the leaders in the area for the farm to table movement, where fresh food is bought from local farmers, brought into his restaurant and served to his customers.  In January of this year, Bill Taibe opened up his latest restaurant, The Whelk, along the water in Westport.  This new restaurant is heavily concentrated on seafood.  Just like Le Farm, The Whelk shares the same artisanal philosophy, using as many fresh and locally grown ingredients as possible.  The Whelk is also focused on fresh and sustainable seafood.

Question:  So, you are asking, what is a whelk?  The answer is below.

While the Whelk is just above the Saugatuck River, the windows in the rectangular dining area face the street, not the water.  Yet the interior has the feel of an informal seafood shack with large harbor lights hung above the bar and slatted picnic chairs and benches, the kind you might find outdoors at a roadside spot.  During our visit, there were eight main course offerings, but it is the smaller plates and appetizers that were the draw for us.  The food that we ate was so good, we are planning to return for a second round next week.  Come see what we ate at our first visit to The Whelk:

We started off with appetizers and small plates.  As in a typical seafood shack, our first courses were served on plates covered in newspaper.  Here is one BBQ little neck clam left from a plate of eight.  These were fresh clams with a little bit of BBQ sauce and bacon placed on top before being placed under the broiler for a few minutes.  These clams went fast.

Another favorite was the hot smoked trout dip served with trout roe and crackers and bread.

We have a friend who says she has never met a potato that she doesn’t like.  Here are some french fries with ketchup and a delicious smoked mayo.

A good wine that was recommended to us by our server.  The Whelk has a large list of by-the-glass and by-the-bottle wines.  This French selection was a little more acidic than I would normally like, but that worked well with the seafood that we ate during our visit.

One of my favorites!  Gulf shrimp and grits with pickled jalapeno-ramp butter and country ham.  Reminds me of our trip to Charleston, SC.

One of the more unique offerings the night we were there.  This is squid ink cavatelli with red shrimp, mexican chorizo and preserved tomatoes.

Cornmeal fried catfish with early summer slaw and walnut-pepper romesco (partly devoured at time of photo).

Rare seared line caught tuna with bacon and black olive and green pea dressing.  An offering that was limited, but we were lucky enough to “snag” one.  Get the seafood joke here?!?

My vote for “Best Of Show”.  Norman’s (we don’t know who Norman is, but he is a man with good taste) lobster butter with leeks, peas and fingerling potatoes.  We were told this is a lobster that is slowly poached and then removed from its shell.  The poaching liquid is then reduced and the lobster meat is added back along with the potatoes, peas and leeks.

What’s dinner without some dessert?  The Whelk offered a small and homey dessert menu for us to choose from.

A quickly devoured set of Whoopie Pies.  These pies never disappoint.

Two at a time…a magic bar in the background with butterscotch and sea salt.  In the front is a meyer lemon posset with cornmeal cookies.  Yummy!

As in our visit to Le Farm, we all left full and happy.  Like I said, we’ll be back on Tuesday so that shows how good The Whelk is.  If you are around Westport, you need to give The Whelk a try.  If you are like us, one trip just won’t be enough.

Answer:  So what is a whelk?  A predatory marine mollusk (family Buccinidae) with a heavy, pointed spiral shell, some kinds of which are edible.  As Bill Taibe has said, calling his restaurant Le Mer would have been too easy.

My Brooklyn-Born Italians Demand Ricotta Cheesecake

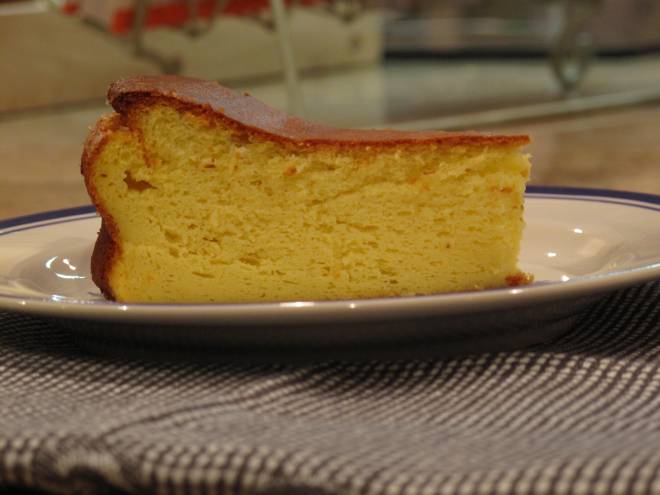
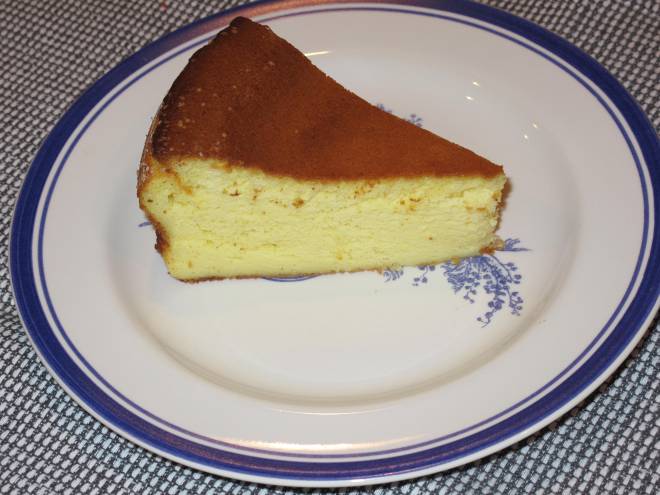
As you know from many earlier posts, I am out numbered here on Glen Road by Brooklyn-born Italians.  There’s nothing wrong with that especially given my love of Italian food.  Most of the Italian cravings are taken care of by cooking from the Notorious B. I. G. (Brooklyn Italian Grandmother).  However, every so often, I am asked to cook something that the troops used to get in Brooklyn.  A good example came when I was asked if I could make “franks on club” meaning you take a hot dog and grill it, then you slice it length wise and serve it on a club roll.  This was served up in a favorite Brooklyn diner and, just so you know, I have yet to attempt this culinary delight.  Another recent request that I did sign up for was to make a cheesecake.  Not regular cheesecake made with cream cheese, but Italian style, using fresh ricotta cheese.  To be honest, I have made the ricotta cheesecake twice before the most recent request and, although it tasted good, it was not a pretty cheesecake because it had cracks on the top.  So this time I signed up to make another one and decided to try to find a way to prevent the severe cracked top that I had experienced with cheesecakes from my past.

There are a lot of ways via the internet to prevent cracking.  From one post that said to spackle up the cracks with some softened ricotta to another post that said to take the cheesecake out of the oven every five minutes and vigorously shake it back and forth.  Honestly, I’m not buying these two solutions.  The one I eventually decided to try (with success!) was one that explained that cheesecake is made with lots of eggs.  In the cooking process, these eggs actually expand which is why the cake rises.  However, when taken out of the oven to a much cooler temperature, the eggs constrict so rapidly that the cheesecake cracks.  The trick to a smooth-topped cheesecake is to cool the cake off in a much slower fashion so that the eggs don’t constrict too quickly and cause cracking.  This solution starts by reducing the cooking time written in the recipe by fifteen minutes.  When the revised cooking time is complete, you simply turn off the oven and do not open the oven door.  Leave the cake in the oven for one more hour so that it continues to cook, but also slowly cools as the oven loses heat.  Let me tell you…it worked!  So here’s my recipe, modified to use my new non-cracking trick with the oven.  Enjoy!

Ingredients:

  • Unsalted butter, room temperature, for pan
  • 1/4 cup sugar, plus more for pan
  • 1 1/2 pounds fresh whole-milk ricotta cheese, pureed in a food processor until smooth
  • 6 large eggs, separated
  • 1/4 cup all-purpose flour
  • 1/4 teaspoon salt

Directions:

Preheat the oven to 375 F.  Generously butter and sugar a 9-inch springform pan.  In a large bowl, whisk together the ricotta, egg yolks, flour, half the sugar (6 tablespoons) and salt until combined; set aside.

Place the egg whites in the bowl of an electric mixer fitted with the whisk attachment; beat on low-speed until foamy.  With the mixer on high-speed, gradually add the remaining 6 tablespoons of sugar, beating until whites are stiff and glossy, 3 to 4 minutes.

Using a rubber spatula, fold a third of the egg-white mixture into the ricotta mixture until combined.  Gently fold in the remaining egg-white mixture until just combined.  Pour into the prepared pan and bake until the center is firm and the top is a deep golden brown.  To avoid cracking, bake 45 minutes and then turn oven off with cheesecake still inside the oven (do not open oven door).  Leave cheesecake in the oven another 1 hour to continue cooking and to slowly cool down.

Transfer to a wire rack to cool for 10 minutes.  Take a paring knife and run it around edge of cake and the cake pan to avoid sticking.  Place another wire rack on top of the pan and invert cake onto the rack to remove from pan.  Reinvert cake and cool completely, top side up.  Cake should be eaten the same day it is baked, however, it can be refrigerated for up to 3 days.  Bring to room temperature before serving.

Short Ribs With Tagliatelle

I really haven’t gotten out the pots and pans and did some real cooking since the New Year began, so I thought the long President’s Day weekend was the perfect opportunity for me to get back into the swing of things.  With my annual beginning of a new year diet and a busy work schedule over, the long weekend seemed perfect for me to get back into the kitchen.  Even though we’ve had a very mild Winter, the temperatures are still dropping below freezing, so I thought some comfort food was in order.  With that in mind, I settled on short ribs with tagliatelle.  Short ribs that simmer on the stove for an entire afternoon with a condensed sauce containing minced vegetables, beef broth and red wine sounded perfect.  This thick and rich sauce is then spooned over tagliatelle, which are long, thin, flat strips of pasta about 1/4 inch wide.  It is very similar to fettuccine.  This recipe is an old Giada recipe given to me by a friend and has been slightly modified from the original.  The final result can be a little dry at times, so follow the recipe and save some pasta water to moisten the dish up if it does turn out to be on the dry side.

Ingredients:

  • 3 tablespoons olive oil
  • 2 ounces chopped pancetta (about 1/2 cup)
  • 2 1/2 pounds short ribs
  • Salt
  • Freshly ground black pepper
  • 1/4 cup all-purpose flour
  • 1 medium onion, chopped
  • 1 carrot, chopped
  • 1/2 cup fresh parsley leaves
  • 2 cloves garlic
  • 1 (14-ounce) can tomatoes (whole or diced)
  • 1 tablespoon tomato paste
  • 1 teaspoon chopped fresh rosemary leaves
  • 1 teaspoon dried thyme
  • 1/2 teaspoon dried oregano
  • 1 bay leaf
  • 2 1/2 cups beef broth
  • 3/4 cup red wine
  • 1 pound fresh or dried tagliatelle

Directions:

Place the olive oil in a large heavy soup pot over medium heat.  Cook the pancetta until golden and crisp, about 4 minutes.  Meanwhile, season the short ribs with salt and pepper, and dredge in the flour.  Using a slotted spoon, remove the pancetta from the pan and set aside.  Add the short ribs to the pan and brown on all sides, about 7 minutes total.

Meanwhile, combine the onion, carrot, parsley and garlic in a food processor and blend until finely minced.  Then add the tomatoes and tomato paste and pulse.

Once the short ribs are browned, carefully add the mixture from the food processor to the pot.  Return the pancetta to the pot and stir.  Add the rosemary, thyme, oregano, bay leaf, beef broth and wine.  Bring the mixture to a boil.  Reduce the heat and simmer, covered, for 1 hour and 15 minutes.  Remove the lid and simmer for another hour and a half, stirring occasionally.  Remove the meat and bones from the pot.  Discard the bones.  Shred the meat and return it to the pot.  Season with 1/2 teaspoon salt and 3/4 teaspoon pepper, or to taste.

Bring a large pot of salted water to a boil over high heat.  Add the pasta and cook until tender but still firm to the bite, stirring occasionally, about 8 to 10 minutes for dried pasta and 2 to 3 minutes for fresh.  Drain the pasta, reserving 1 cup of the cooking liquid.  Add the pasta to the pot and stir to combine.  Add the reserved pasta liquid 1/4 cup at a time, if needed, to moisten the pasta.  Transfer to serving bowls and serve immediately.

Good Food From Fellow Bloggers

It’s funny how my recipe hunting habits have changed since we started Acorns On Glen.  I used to spend hours reading cookbooks to find that one recipe that was  perfect for that night’s dinner or just the right dessert to end a certain meal on a high note.  I love to cook, but have always cooked using recipes from cookbooks.  I envy people like the Notorious B.I.G. (Brooklyn Italian Grandmother) that can cook a variety of dishes from memory, using just the right amount of this or that by feel versus measuring cups and spoons to get exactly the amount the recipe states.  I think it is the accountant in me that is the reason why I always cook from cookbook recipes.  I like to be able to read the step-by-step narrative and picture in my head what each step will look like and exactly when I will need to chop something or measure something out.

Cookbook reading can also turn into an expensive habit.  I have at least two bookcases full of them ranging from the newest selection from one of the chef’s on the Food Network to cookbooks from chefs that cook at one of the many restaurants we go to when staying in New York City or when we go on vacation.  So while I still spend a lot of time reading and looking for a recipe that will make that night’s perfect dish, I now do it through all the great cooks that blog here on WordPress.  Almost every day, I go into the list of WordPress topics and click on “Recipes” or “Food”.  That takes me into the best cookbook I have read in years.  I’ve been calling it “The WordPress Cookbook”.  There are so many cooks posting recipes for great dishes from all around the world and honestly, I’ve cooked a lot of them.

Which brings me to the sticky buns I made over the weekend from joshuafagans.  His writing about how they are his family’s Christmas tradition was great, but it was the picture of the buns themselves that made my mouth water.  I have to say that I don’t have great luck in making dough.  For whatever reason, my dough never seems to rise very high or seems like a big strip of rubber.  However, after seeing the picture from joshuafagans, I was ready for a little dough adventure.  Please read the original post over at joshuafagans and see how to make it the sane way as well as the quick way, which is pretty funny.  My version is below.  I followed the recipe exactly as written using the “sane” way….read his post and you’ll understand.  Thanks joshuafagans for such a great post and a delicious recipe!

  • 1 cup scalded milk (scalded milk is just heated milk.  You know you are there when bubbles come up on the sides of the pan, but the milk is not yet boiling)
  • 1/2 cup unsalted butter
  • 1/3 cup sugar
  • 1 1/2 tsp kosher salt
  • 1 package yeast
  • 1/4 cup warm water
  • 3 eggs
  • 5 1/2 cups flour

Melt the butter in the scalded milk and allow to cool.  Soften the yeast in the water.  Mix milk mixture with the yeast, eggs, sugar, salt and flour.  I did this in a standing mixer until a ball formed and then took the dough out and kneaded it until smooth and elastic.  I let the dough rise for 3 hours inside of my oven with the “Proof” setting turned on.

Divide the dough in half and roll each half into a 10″ x 18″ rectangle.  Spread the butter onto each half.  Combine the sugar and cinnamon and sprinkle over each rectangle.  Drizzle the syrup over both as well.

Roll the rectangles up in a jelly roll fashion and then slice each roll into 12 slices.  Place into two 9 inch cake pans and let rise for another hour.

Preheat the oven to 350 and bake until nice and brown, at least 30 minutes.  Allow to cool for a few minutes before taking out of the pan.

So give “The WordPress Cookbook” a try if you haven’t already.  If you make these sticky buns, be sure to stop by joshuafagans and thank him.  Enjoy!

2011’s Top 11 – Decided By You

JoJo the Yorkie and I curled up yesterday to pick the top 11 stories that we posted during 2011 here on Acorns On Glen.  Some of us curled up a little too much.  Can you see where JoJo starts and the faux fur blanket ends?  We started this blog in February as a way for us to realize and then give thanks for all the great things that happen in our lives.  You just can’t take life for granted and this blog is a great way for us to reflect and cherish the fact that we have great family, great friends and now a whole group of great people that visit Acorns On Glen on a frequent basis.  We’ve been blown away by the number of people that stop by and read our posts.  Thanks to all of you who have welcomed us into your lives this year.  The posts that have been visited the most are varied, but the majority of the top 11 seems to show that all of you, our readers, like good food and how to cook it.  Here are 2011’s top 11 posts:

1.  Funky Italian Stuffed Peppers

Our Notorius B.I.G. (Brooklyn Italian Grandmother) heads the list with her great recipe for cubanelle peppers.

2.  South Carolina’s Unbelievable Angel Oak

You liked our sight-seeing trip down in Charleston, South Carolina.

3.  Time For Tuberous Begonias

The story about the begonia tubers I’ve had for years is our most viewed gardening post.

4.  Lots Of Bling – Christie’s Important Jewels

You like jewelry, eh?  Yes you do, big stones with lots of sparkle is what you like.

5.  The Man Behind The Curtain

My bio….you like me, you really like me.

6.  A Toadstool Birthday Tea

Our first guest blogger shows us how to throw a great birthday tea for the little ones.

7.  Luna Moth Or Not – You Be The Judge

A truly magnificent discovery that landed on the back side of our house and stayed for a few days so that we could marvel at it.

8.  A Field Trip To Le Farm Restaurant

Just like us, you enjoyed the cooking of Bill Taibe at his Westport, CT restaurant, Le Farm.

9.  Chocolate Caramel Tart With Fleur De Sel

Who can resist this sweet-salty flavor combination?  We can’t!

10.  Thinking Of My Citrus House Guests

Our little orange and lime trees impressed this year and even gave us a few pieces of fruit.

11.  Meatball Mania With Sauce

Finishing off just the way we started, another hit dish from Notorius B.I.G.

So here’s to everyone who has helped make Acorns On Glen a success.  We are truly humbled by the response, along with your words of encouragement, and can’t wait to share 2012 with you.  We want to wish everyone a Happy New Year (wish I could pass everyone a glass of champagne now) and may 2012 bring you great joy and happiness beyond your wildest imagination.

Christmas Cookie #4 – Cashew Brittle (Not A Cookie, But We Can Pretend)

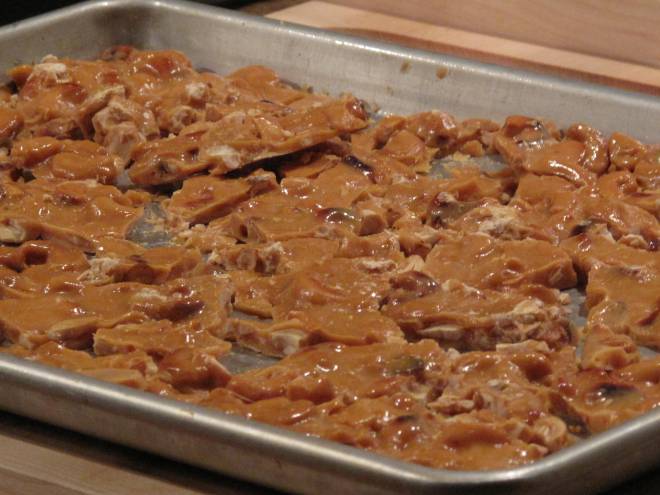
This brittle has always been a Christmas staple in my household.  I can remember my mom making this brittle as a very young child.  It’s funny about old memories.  My memory of my mom making brittle is as clear as it was when I was actually watching her.  I can remember what the pan looked like that she used, I can remember the exact spoon and even what the candy thermometer looked like.  I can also remember eating pounds of it, including it at breakfast, lunch and dinner.  Over time, I have taken her recipe and made some modifications.  The biggest one is that I replaced peanuts with whole cashews.  The cashews give the brittle a little more crunch and a little bit more creaminess.  I also try to eat only a few pieces now versus half the container like I used to do when I was a kid.  One thing I haven’t changed from my mom’s recipe is that I try to stretch the brittle as thin as possible.  It is a lot more delicious when your pieces are thin versus thick.  Here’s how we made the cashew brittle this year:

Ingredients:

  • 1 tablespoon unsalted butter, plus more for pan
  • 2 1/2 cups salted, roasted cashews
  • 1 cup sugar
  • 1 cup light corn syrup
  • 1 tablespoon baking soda

Directions:

Butter a large baking pan; set aside.  Combine cashews, sugar and corn syrup in a medium saucepan.  Set over medium-high heat and bring to a boil, stirring constantly.

Insert a candy thermometer.  Continue boiling, without stirring, until temperature registers 295 degrees, about 6 minutes.  When sugar begins to brown, stir nuts gently to ensure even cooking.  Remove saucepan from heat, and stir in the butter and baking soda; the mixture will begin to foam up, so mix quickly.  Pour onto the prepared baking pan.

As soon as the brittle is cool enough to handle, use your fingers to stretch the brittle as thinly as possible over the baking pan.

Allow the brittle to cool completely, about 45 minutes, then break into bite-size pieces.

This cashew brittle is salty-sweet perfection.  Be careful though, it can become addictive.  You won’t be able to stop eating it once you start.  I like this brittle as well for all the memories it has brought me through the years.  It’s nice to include something in your Christmas cookie collection that reminds you of Christmas past.  So there you have it.  Our Christmas cookie and treat selection for 2011.  I love how the flavors are all unique and stand up well on their own, but also how they complement each other when you make a tin up for a friend.  Coconut pyramids that look like little modern pieces of art, the long biscotti with its red cranberries and green pistachios in the mix, the pretty cookie press cookies that are too cute to eat and the salty-sweet cashew brittle.  The four of these really make a nice little treat for Santa, but better than that, for you and your family to enjoy over the Christmas holiday.  Thanks for baking with us!  Do you and your family eat all of your Christmas baked goods or do you share them with other family and friends too?

Christmas Cookie #3 – Cookie Press Cookies (Depressed With My Press)

This cookie press recipe was a true test of my baking and decorating patience.  As most of you know, a cookie press is nothing more than a hollow tube fitted with a decorative nozzle at one end and a plunger at the other.  You insert your cookie dough into the hollow tube and then you press a trigger that makes the plunger press out the dough.  The dough is pressed out through the decorative nozzle and a pressed cookie is formed.  The nozzle holds discs that turn the dough into various shapes-hearts, wreaths, Christmas trees, flowers-the list is long and covers most of the major holidays.  Here is the cookie press I used at the start of my baking.  Little did I know that two more would follow.

I’ve discovered that my right arm has gotten incredibly strong.  That’s because my squeezing of the cookie press trigger achieved pressing out five dozen cookies, but, on the bad side, it broke three cookie presses.  Yes, three presses that broke-two triggers broke off and one shaft that holds the dough cracked into two pieces!  Is this bad luck or what?  I got my cookies done, but had to order a new press at the end as a result.  This time I paid a little bit more and got a “heavy-duty” press.  I’m hoping this solves the problem.

These cookies are very tasty, with a rich butter and vanilla taste.  The recipe calls for 1 tablespoon of vanilla, which seems like a lot, but really works well with the dough.  After the cookies had cooled, we decorated each one with a glaze made out of confectioner’s sugar and a variety of cookie decorating supplies-colored sanding sugars, melted chocolate, tinted glazes, chocolate sprinkles, etc.  Most of it was purchased at the supermarket so just have fun and get whatever supplies catch your eye.  With cookie decorating, there really is no bad way to do it.  Here’s the steps:

For the cookies:

Ingredients:

  • 1 1/2 cups (3 sticks) unsalted butter
  • 1 cup sugar
  • 2 large egg yolks
  • 3 3/4 cups sifted all-purpose flour
  • 1/4 teaspoon salt
  • 1 tablespoon pure vanilla extract
  • 6 ounces semisweet chocolate, melted, for decorating
  • Confectioners’ Sugar Glaze (see recipe below)
  • Food coloring, preferably gel-paste, for decorating
  • Sanding sugar, for decorating
  • Other favorite items, to use for decorating

Directions:

Line a baking sheet with parchment paper or a nonstick baking mat; set aside.

In the bowl of an electric mixer fitted with the paddle attachment, cream together butter and sugar until light and fluffy.

Add egg yolks, flour, salt, and vanilla.  Mix until well combined.

Fit cookie press with desired disk and fill with dough.  Press out shapes onto prepared baking sheets.  Transfer to refrigerator until chilled, about 30 minutes.

Preheat oven to 350 degrees.  Bake until cookies are lightly browned, 7 to 10 minutes.  Transfer to a wire rack to cool.

To decorate, tint confectioners’ sugar glaze as desired (dividing it among a few bowls to make different colors, if desired). Dip cookies in glaze and decorate with sanding sugar, nonpareils, or dragees.  Let set until the glaze dries, at least 1 hour before serving or storing. Cookies can be stored, between layers of parchment, up to 1 week at room temperature in airtight containers.

For the glaze:

Ingredients:

  • 1 cup confectioners’ sugar, sifted
  • 2 tablespoons water

Directions:

Mix confectioners’ sugar and the water to achieve an easy-to-pour consistency, adding more water as necessary. Use immediately.

These are a great cookie.  They taste great and look great.  Impress your family and friends with a cute little decorated cookie.  They will be impressed.  At our house right now, none of us want to eat my cookie press cookies.  Not because they don’t taste good, but because they are so pretty.  Knowing how we like to eat, this mood will change soon and we will devour them.  It’s the holidays right?  Overeating is expected!  Do you make any decorated cookies during the holidays?

Christmas Cookie #2 – Cranberry-Pistachio Biscotti (Or Hey You, Give Me Something To Dip Into My Coffee)

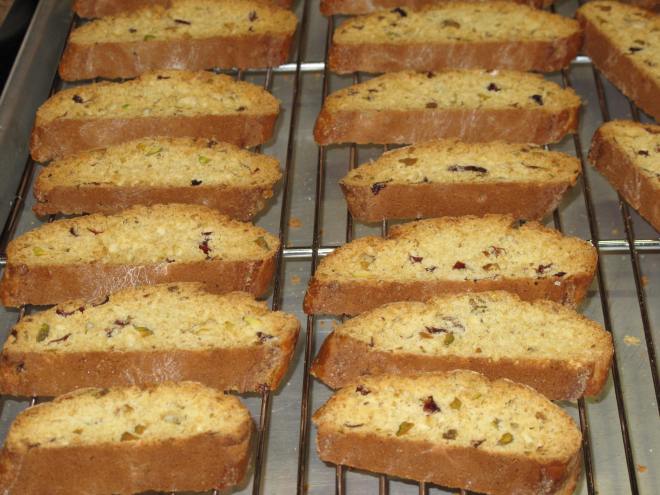
This is a batch of biscotti, which is technically not a cookie at all, but rather a biscuit.  However, it has always been part of my Christmas cookie baking timeline whenever the mood hits me to bake Christmas cookies.  Did you know that biscotti is the plural form of biscotto?   The word biscotto originates from the medieval Latin word biscoctus, meaning twice-cooked/baked.  So there you have the secret of making a batch of biscotti.  You make two long loaves of dough, bake them, let them cool a little and then slice them and bake them again.  The second bake actually hardens them up a little so that they last a little while longer than a normal cookie does.  Their hardness also makes it a favorite for dipping into coffee or tea.

That’s another reason I make them.  The holidays at our house see a lot of coffee that is drank on a daily basis.  I find it amazing that the people who are older and have the weaker kidneys are usually the ones that ask for the most coffee to drink and a little something to nibble on while drinking.  I have not done a scientific test on this factoid as of yet, but I know it would fall out as a solid statement if I did.  For each cup poured, many times there is the question “What do you have to dip into this coffee?”   Many times they ask this by calling my name and, more than a few times, my name is forgotten and a simple “Hey you!” starts out the request.

The biscotti recipe I always make is filled with cranberries and pistachios.  When you look down at the sides of the biscotti, there are little flecks of red (the cranberries) and green (the pistachio nuts).  What screams holiday more than bursts of red and green?  Here’s how we make the biscotti in our house:

Ingredients:

  • 1/2 cup dried cranberries
  • 1/2 cup boiling water
  • 3 cups all-purpose flour, plus more for dusting
  • 2 teaspoons baking powder
  • 1/4 teaspoon salt
  • 4 tablespoons unsalted butter, room temperature
  • 1 cup sugar, plus more for sprinkling
  • 3 large eggs, plus 1 large egg, lightly beaten
  • 2 teaspoons pure vanilla extract
  • 1/2 cup (2 1/2 ounces) unsalted pistachios, coarsely chopped

Directions:

Preheat oven to 375 degrees.  Line a large baking sheet with parchment paper; set aside.  Place cranberries in a small bowl; add boiling water.  Let stand until plump, about 15 minutes.  Drain, and set aside.  Sift together flour, baking powder, and salt into a medium bowl; set aside.

In the bowl of an electric mixer fitted with the paddle attachment, beat butter and sugar on medium speed until light and fluffy, about 2 minutes.  Add 3 eggs, one at a time, beating to incorporate after each addition and scraping down sides of bowl as needed.  Beat in vanilla.  Add flour mixture, and mix on low-speed until combined.  Mix in cranberries and pistachios.

Turn out dough onto a lightly floured surface; divide in half.  Shape each piece into a 16-by-2-inch log, and transfer to prepared baking sheet, about 3 inches apart.  With the palm of your hand, flatten logs slightly.  Brush beaten egg over surface of the dough logs, and sprinkle generously with sugar.

Bake, rotating sheet halfway through, until logs are slightly firm to touch, about 25 minutes.  Transfer logs on parchment paper to a wire rack to cool slightly, about 20 minutes.  Reduce oven temperature to 300 degrees.

Place logs on a cutting board.  Using a serrated knife, cut logs crosswise on the diagonal into 1/2-inch-thick slices.  Place a wire rack on a large rimmed baking sheet.  Arrange slices, cut sides down, on rack.  Bake until firm to touch, about 30 minutes.  Remove pan from oven; let biscotti cool completely on rack.  Biscotti should be kept in an airtight container.

You know you have turned out a great batch when all you hear during “coffee breaks” is the crunch, crunch, crunch of a group of folks gnawing on your cranberry-pistachio biscotti.  Thanks for reading about our second cookie made for the season.  There will be other posts about our Christmas baking through the big day on December 25.  We hope you will come back and “bake” with us.  We like the company!!  What is your favorite kind of Christmas cookie?

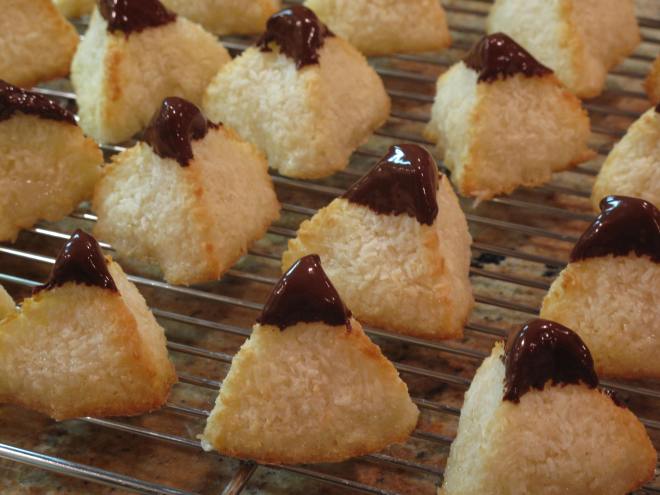
Christmas Cookie #1 – Coconut Pyramids (No Trip To Egypt Needed)

This is always the first cookie I make if and when I get into the Christmas cookie baking mode.  Coconut pyramids start the season off right.  Front up, I will tell you, it’s not every season I get into the mood to make Christmas cookies.  When I do, these coconut pyramid macaroons are first up at bat.  Why coconut macaroons you may be asking versus something more traditional for the holidays?  I’m not sure I know that answer other than to say they are quick to make and bake.  It’s probably a mental thing…you start off with something easy that always turns out right and then you get into a state where you start taking more challenges with more complicated recipes.  Know that the hardest part of this recipe is finding unsweetened coconut.  The only place I have found it is at my local health food store.  I’ve used the sweetened kind of coconut from the supermarket, but it just does not work.

I first baked these macaroons in 2001 when I ran across the recipe in a cookbook I had purchased.  I remember thinking that they would look like little snow drifts among the other cookies that I had baked that year.  Since everyone I gave cookies to that year was really in the mood for coconut (I guess), these pyramids received a lot of compliments and I’ve been making them ever since.  Coconut macaroons are light and chewy.  The little tip of chocolate at the end of the cookie is a nice little touch as well.  It’s the pyramid shape that I find the best part of the cookie.  It looks like it takes a long time to shape them, but it is pretty quick and painless.  You don’t have to make them your first Christmas cookie of the season, but do give them a shot this year.  It’s always nice to start a new tradition.  Why not do it with a coconut pyramid?

Ingredients:

  • 1 3/4 cups sugar
  • 5 1/4 cups unsweetened shredded coconut (I find mine at a local health food store)
  • 7 large egg whites
  • 1 pinch salt
  •  2 tablespoons unsalted butter, melted
  • 1 teaspoon pure almond extract
  • 1 teaspoon pure vanilla extract
  • 4 ounces semisweet chocolate
  • 1/2 teaspoon pure vegetable shortening

Directions:

Heat oven to 350 degrees.  Line a baking sheet with parchment.  In a large bowl, mix together sugar, coconut, egg whites and salt.  Add butter and extracts and combine well.  Refrigerate for at least 1 hour.

Moisten palms of hands with cold water.  Roll 1 tablespoon of the coconut mixture in palms, squeezing tightly together 2 or 3 times to form a compact ball.  Place ball on a clean surface and, using a spatula, flatten one side at a time to form a pyramid shape.

Place pyramids on the prepared baking sheet about 1 inch apart and bake until edges are golden brown, about 15 minutes.  Leave on baking sheet on a wire rack to cool completely.

Place chocolate and shortening in a small heat-proof bowl and set over a pan of simmering water; stir occasionally until melted.  Dip top 1/2 inch of each pyramid in the melted chocolate.  Set each dipped macaroon on cooled baking sheet to allow chocolate to harden.

For some reason, my friends, family and I find it hard to eat just one of these cookies at any given sitting.  They go pretty fast, so be prepared.  I’ll be posting a few more Christmas cookie favorites over the next couple of weeks.  I’m in the mood to bake them this year, so why not share the recipes with the masses.  Enjoy!!  What is your favorite cookie that you make for the holidays?