There are many ways to bring in the New Year. So whether you want to bring it in all sweet and sentimental or you bring it in rowdy and crazy, the choice is for you to make. Whatever way you choose, please know that all of us here at Acorns On Glen want to wish you, your family and your friends a very Happy New Year 2012 and may even your wildest and craziest dreams come true. We look forward to spending more time with you in 2012. Our best to you in the New Year…………and where is the Advil for our friend below?
Month: December 2011
2011’s Top 11 – Decided By You
JoJo the Yorkie and I curled up yesterday to pick the top 11 stories that we posted during 2011 here on Acorns On Glen. Some of us curled up a little too much. Can you see where JoJo starts and the faux fur blanket ends? We started this blog in February as a way for us to realize and then give thanks for all the great things that happen in our lives. You just can’t take life for granted and this blog is a great way for us to reflect and cherish the fact that we have great family, great friends and now a whole group of great people that visit Acorns On Glen on a frequent basis. We’ve been blown away by the number of people that stop by and read our posts. Thanks to all of you who have welcomed us into your lives this year. The posts that have been visited the most are varied, but the majority of the top 11 seems to show that all of you, our readers, like good food and how to cook it. Here are 2011’s top 11 posts:
1. Funky Italian Stuffed Peppers
Our Notorius B.I.G. (Brooklyn Italian Grandmother) heads the list with her great recipe for cubanelle peppers.
2. South Carolina’s Unbelievable Angel Oak
You liked our sight-seeing trip down in Charleston, South Carolina.
The story about the begonia tubers I’ve had for years is our most viewed gardening post.
4. Lots Of Bling – Christie’s Important Jewels
You like jewelry, eh? Yes you do, big stones with lots of sparkle is what you like.
My bio….you like me, you really like me.
Our first guest blogger shows us how to throw a great birthday tea for the little ones.
7. Luna Moth Or Not – You Be The Judge
A truly magnificent discovery that landed on the back side of our house and stayed for a few days so that we could marvel at it.
8. A Field Trip To Le Farm Restaurant
Just like us, you enjoyed the cooking of Bill Taibe at his Westport, CT restaurant, Le Farm.
9. Chocolate Caramel Tart With Fleur De Sel
Who can resist this sweet-salty flavor combination? We can’t!
10. Thinking Of My Citrus House Guests
Our little orange and lime trees impressed this year and even gave us a few pieces of fruit.
Finishing off just the way we started, another hit dish from Notorius B.I.G.
So here’s to everyone who has helped make Acorns On Glen a success. We are truly humbled by the response, along with your words of encouragement, and can’t wait to share 2012 with you. We want to wish everyone a Happy New Year (wish I could pass everyone a glass of champagne now) and may 2012 bring you great joy and happiness beyond your wildest imagination.
Friday Dance Party With Some Extras – It All Starts With A Christmas Without You
This is another edition of Friday Dance Party on Acorns On Glen. It’s the time where we give thanks for making it through another week and for being alive and present here on Earth. How do we celebrate another week of living? We dance. So, are you alive this Friday? Are you and your family safe and sound? Take a few seconds now to be in the moment and realize what a great life you truly have. Did you give thanks for that?
Good, now let’s dance.
It’s our last Friday before Christmas. I hope everyone has purchased all their gifts and have wrapped the majority of them. Unlike me, that has not even sent one box to my family back home in Iowa, does not have all their presents purchased and not one single package wrapped. I may be in trouble, but as a woman at work told me there is always money. It always fits and is always the right color. I think this week it is only right to dance to another Christmas carol. Last week, we listened to one of my favorite Christmas songs sung by Judy Garland in “Meet Me In St. Louis”. Here is another favorite but we will need to travel from 1944 (the year last week’s song was released to the masses) to 1984 (when this week’s song was released to the public). Yes, 1984! I can’t believe that it was over 25 years ago that I watched the Christmas special “A Christmas To Remember” with Dolly Parton and Kenny Rogers. O.K., their names may make you snicker a little, but back in 1984 these two were hot, hot, hot. They were just coming off the success of their smash hit “Islands In The Stream” and so naturally when you have a big hit you immediately turn around and do a Christmas special with some new Christmas songs to introduce. Are you thinking Justin Bieber right now? The same trick is being used over 25 years later.
I don’t know what it was then, but my friends and I that watched this special loved this song. We bought the album (yes, it was an album) and have listened pretty much every year to this song (from album, to cassette tape and now to CD). We have actually used it to tease several of my divorced friends. What better way to tease someone divorced than to play “Christmas Without You” over and over and over. Call us cruel, but this “inside joke” has helped keep the song alive for us over all these years.
This week, I’ll admit finding that one perfect Christmas song for us to dance to was tough. I have a lot of favorites. Let me share with you some of my runner-ups. If Dolly and Kenny aren’t your style, here are a couple of alternatives:
I love me some Amy Grant!
A Nat King Cole classic.
I still have the original album in my collection. It’s the same album cover as in this little goodie.
I hope you liked this little Friday Dance Party with a twist. Pick your favorite from the music above and just dance. It’s the holidays and we’re still alive and kicking. Here’s to us!! I wish all of you a happy holiday season and let’s pray for peace on Earth. What are your favorite Christmas carols or other holiday music?
Christmas Cookie #4 – Cashew Brittle (Not A Cookie, But We Can Pretend)
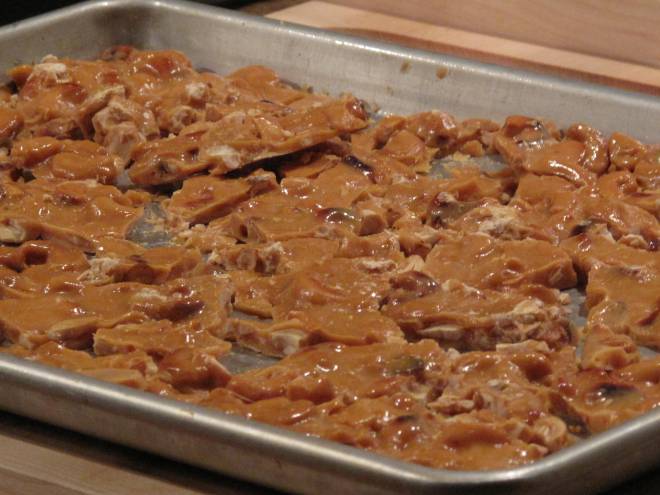
This brittle has always been a Christmas staple in my household. I can remember my mom making this brittle as a very young child. It’s funny about old memories. My memory of my mom making brittle is as clear as it was when I was actually watching her. I can remember what the pan looked like that she used, I can remember the exact spoon and even what the candy thermometer looked like. I can also remember eating pounds of it, including it at breakfast, lunch and dinner. Over time, I have taken her recipe and made some modifications. The biggest one is that I replaced peanuts with whole cashews. The cashews give the brittle a little more crunch and a little bit more creaminess. I also try to eat only a few pieces now versus half the container like I used to do when I was a kid. One thing I haven’t changed from my mom’s recipe is that I try to stretch the brittle as thin as possible. It is a lot more delicious when your pieces are thin versus thick. Here’s how we made the cashew brittle this year:
Ingredients:
- 1 tablespoon unsalted butter, plus more for pan
- 2 1/2 cups salted, roasted cashews
- 1 cup sugar
- 1 cup light corn syrup
- 1 tablespoon baking soda
Directions:
Butter a large baking pan; set aside. Combine cashews, sugar and corn syrup in a medium saucepan. Set over medium-high heat and bring to a boil, stirring constantly.
Insert a candy thermometer. Continue boiling, without stirring, until temperature registers 295 degrees, about 6 minutes. When sugar begins to brown, stir nuts gently to ensure even cooking. Remove saucepan from heat, and stir in the butter and baking soda; the mixture will begin to foam up, so mix quickly. Pour onto the prepared baking pan.
As soon as the brittle is cool enough to handle, use your fingers to stretch the brittle as thinly as possible over the baking pan.
Allow the brittle to cool completely, about 45 minutes, then break into bite-size pieces.
This cashew brittle is salty-sweet perfection. Be careful though, it can become addictive. You won’t be able to stop eating it once you start. I like this brittle as well for all the memories it has brought me through the years. It’s nice to include something in your Christmas cookie collection that reminds you of Christmas past. So there you have it. Our Christmas cookie and treat selection for 2011. I love how the flavors are all unique and stand up well on their own, but also how they complement each other when you make a tin up for a friend. Coconut pyramids that look like little modern pieces of art, the long biscotti with its red cranberries and green pistachios in the mix, the pretty cookie press cookies that are too cute to eat and the salty-sweet cashew brittle. The four of these really make a nice little treat for Santa, but better than that, for you and your family to enjoy over the Christmas holiday. Thanks for baking with us! Do you and your family eat all of your Christmas baked goods or do you share them with other family and friends too?
The Evil Little Theater Cup
This is the heart of Broadway and what it looks like outside a theater when a show finishes. There are cars there to pick up the stars and fans lined up and down the sidewalk to get a look at or talk a little bit to the stars. Hugh Jackman gets quite a crowd who wait for him each night. He should–his show is great. See the people who are waiting on the left? Usually after a show lets out, my group always runs out of the theater and starts looking for a cab. It’s hard to get a cab when everyone else who has been to a show is trying along with you. We usually have dinner plans too so we need to get to the restaurant pronto. It was different this night. There was no need to rush. Why rush? This was different. Why the change from hurried to mellow? What had changed inside of me on this night of theater?
Blame it on the evil theater cup!
I saw my first show on Broadway in 1986. It was “Song & Dance” with Bernadette Peters. I have been going to see shows on Broadway ever since. One thing in all these years has remained constant. You are not allowed to bring any food or beverage to your seat. That is the law of theater! You can eat and drink before a show or at intermission, but do not bring it back to your seat. If you even tried to break the rule, you would be hit with a flashlight beam and there would be an usher telling you to hand it over. No eating! No drinking! These ushers would have the meanest face when you looked up at them from your seat with your bottle of water or your last Milk Dud in hand. These ushers would make prison guards nervous. Now all of this has changed.
It might have been sooner, but this year I’ve noticed a change. You can take drinks to your seat in the shows I’ve gone to as long as the drink is in the evil little theater cup. Think of this cup as a sippie cup for adults meaning that if you drop them, they don’t spill. All that is on top of the cup’s lid is a little hole you open up and stick a straw through. At the bar, the bartenders will fill you up with your beverage of choice. Soda to the top of the rim. For $11, you get a cup that is half full of wine. For $21, you get your cup filled to the top with wine. For me, nothing says “classy night out on Broadway” more than sitting back watching a show with a sippie cup filled to the top with Chardonnay. If you time it right, you draw your last sip through your straw at the end of Act I. Then you go back to the bar at intermission and get another cup full. This time around it is $16 because you get a discount if you bring your cup back to be refilled. Then right before the 11 o’clock number, you are sitting there in your seat with your empty cup in hand and you realize “I’m drunk”. You then do things you have never done:
- You have an ugly cry for all to see during the last song of the show.
- You give a standing ovation to the star while all the while hooting and hollering and making a spectacle of yourself.
- You stumble out of the theater telling people you don’t know that you just spent $37 on wine.
- You proceed to tell your friends that next time you are going to save money and just buy a bottle of wine at the liquor store and have the bartender hold it for you because you can fill your own cup.
- You don’t run like hell to catch a taxi. The restaurant can wait!
- You realize that the evil little theater cup is a blessing and a curse.
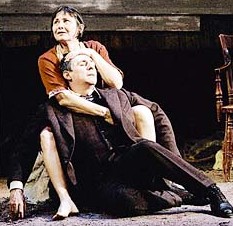
Now I know that the invention of the evil little theater cup was probably done to boost sales during the slump in the economy. However, I think it is also a great idea to use for shows that are not very good. If I could have had my two cups full of Chardonnay in years past, I might have stuck around for the end of “A Moon For The Misbegotten”.
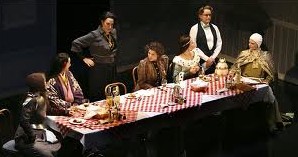
I wouldn’t have fallen asleep during “Top Girls”.
Lastly…..yes, I’ll publicly admit this……I wouldn’t have wished I could get a musket and shoot all of those revolutionaries on stage in “Les Miserables” just to make it end.
So, I don’t like change very much, but I think that the evil little theater cup is a keeper. It makes a great show even better and I hope to also use it someday to see if it can make a bad show at least a little more bearable. Oh, as with everything, moderation is key when using the evil little theater cup. Who am I kidding? I would sit there and drink wine out of a bottle with a straw if they’d let me. Enjoy your next show, with or without a little booze. What do you think of being able to eat and drink at your seats?
Christmas Cookie #3 – Cookie Press Cookies (Depressed With My Press)
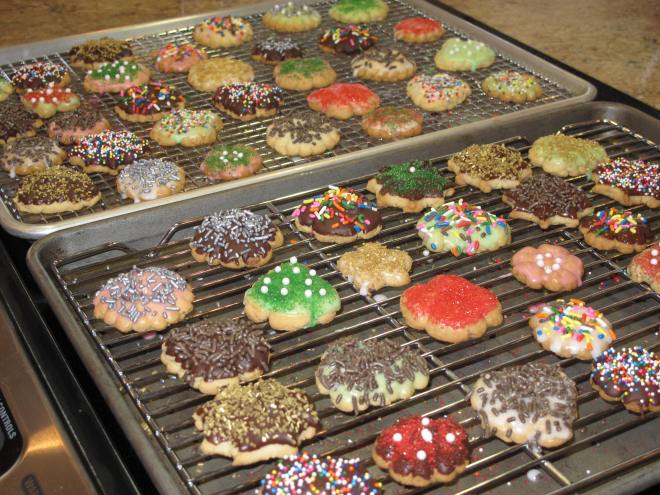
This cookie press recipe was a true test of my baking and decorating patience. As most of you know, a cookie press is nothing more than a hollow tube fitted with a decorative nozzle at one end and a plunger at the other. You insert your cookie dough into the hollow tube and then you press a trigger that makes the plunger press out the dough. The dough is pressed out through the decorative nozzle and a pressed cookie is formed. The nozzle holds discs that turn the dough into various shapes-hearts, wreaths, Christmas trees, flowers-the list is long and covers most of the major holidays. Here is the cookie press I used at the start of my baking. Little did I know that two more would follow.
I’ve discovered that my right arm has gotten incredibly strong. That’s because my squeezing of the cookie press trigger achieved pressing out five dozen cookies, but, on the bad side, it broke three cookie presses. Yes, three presses that broke-two triggers broke off and one shaft that holds the dough cracked into two pieces! Is this bad luck or what? I got my cookies done, but had to order a new press at the end as a result. This time I paid a little bit more and got a “heavy-duty” press. I’m hoping this solves the problem.
These cookies are very tasty, with a rich butter and vanilla taste. The recipe calls for 1 tablespoon of vanilla, which seems like a lot, but really works well with the dough. After the cookies had cooled, we decorated each one with a glaze made out of confectioner’s sugar and a variety of cookie decorating supplies-colored sanding sugars, melted chocolate, tinted glazes, chocolate sprinkles, etc. Most of it was purchased at the supermarket so just have fun and get whatever supplies catch your eye. With cookie decorating, there really is no bad way to do it. Here’s the steps:
For the cookies:
Ingredients:
- 1 1/2 cups (3 sticks) unsalted butter
- 1 cup sugar
- 2 large egg yolks
- 3 3/4 cups sifted all-purpose flour
- 1/4 teaspoon salt
- 1 tablespoon pure vanilla extract
- 6 ounces semisweet chocolate, melted, for decorating
- Confectioners’ Sugar Glaze (see recipe below)
- Food coloring, preferably gel-paste, for decorating
- Sanding sugar, for decorating
- Other favorite items, to use for decorating
Directions:
Line a baking sheet with parchment paper or a nonstick baking mat; set aside.
In the bowl of an electric mixer fitted with the paddle attachment, cream together butter and sugar until light and fluffy.
Add egg yolks, flour, salt, and vanilla. Mix until well combined.
Fit cookie press with desired disk and fill with dough. Press out shapes onto prepared baking sheets. Transfer to refrigerator until chilled, about 30 minutes.
Preheat oven to 350 degrees. Bake until cookies are lightly browned, 7 to 10 minutes. Transfer to a wire rack to cool.
To decorate, tint confectioners’ sugar glaze as desired (dividing it among a few bowls to make different colors, if desired). Dip cookies in glaze and decorate with sanding sugar, nonpareils, or dragees. Let set until the glaze dries, at least 1 hour before serving or storing. Cookies can be stored, between layers of parchment, up to 1 week at room temperature in airtight containers.
For the glaze:
Ingredients:
- 1 cup confectioners’ sugar, sifted
- 2 tablespoons water
Directions:
Mix confectioners’ sugar and the water to achieve an easy-to-pour consistency, adding more water as necessary. Use immediately.
These are a great cookie. They taste great and look great. Impress your family and friends with a cute little decorated cookie. They will be impressed. At our house right now, none of us want to eat my cookie press cookies. Not because they don’t taste good, but because they are so pretty. Knowing how we like to eat, this mood will change soon and we will devour them. It’s the holidays right? Overeating is expected! Do you make any decorated cookies during the holidays?
Friday Dance Party – Getting Into The Spirit Of Christmas
This is another edition of Friday Dance Party on Acorns On Glen. It’s the time where we give thanks for making it through another week and for being alive and present here on Earth. How do we celebrate another week of living? We dance. So, are you alive this Friday? Are you and your family safe and sound? Take a few seconds now to be in the moment and realize what a great life you truly have. Did you give thanks for that?
Good, now let’s dance.
It’s official…we are most definitely in the holiday season. Besides coconut pyramids and cranberry-pistachio biscotti, Christmas carols are always needed to get me into peak Christmas spirit. So given we are a little over a week away from Christmas, I thought it was only appropriate to pull out one of my favorites. There is none better to me than Judy Garland singing “Have Yourself A Merry Little Christmas” from the 1944 movie “Meet Me In St. Louis”. I love this song on so many different levels. First off, Judy Garland can sing this song with a voice so clear and sweet how can you help not loving it. The way it was shot is also fantastic. Every time I watch this clip, I feel like I am sitting there in that cold room with them looking out over the snow in the yard. The lyrics about friends and family are great. Isn’t that really what the holidays are all about? I also love the back story on the movie. Judy Garland was 21 when she was filming the movie and it was the movie that successfully transitioned her from child star to an adult superstar. The movie was also directed by Vincente Minnelli, who fell in love with Judy Garland during the filming and eventually became her husband. From there, I’m sure you all know that this union produced a daughter, Liza Minnelli. Margaret O’Brien, who is the little girl in this clip, won an Oscar for her work in this great movie. The song is also special to me even more than it has been in years past. It’s because this year I won’t be with my parents and brother for Christmas day, so the lyrics really hit home because I think this is only the second time in my life I have not been with them.
Someday soon, we all will be together,
If the fates allow,
Until then, we’ll have to muddle through somehow,
So have yourself a merry little Christmas now
So join me in getting into the spirit of Christmas and listen to this little carol. Turn your speakers up and I assure you that when the song is over you will be a little more in the mood for this holiday. I hope you like it as much as I do. What is your favorite Christmas carol of all time?
Christmas Cookie #2 – Cranberry-Pistachio Biscotti (Or Hey You, Give Me Something To Dip Into My Coffee)
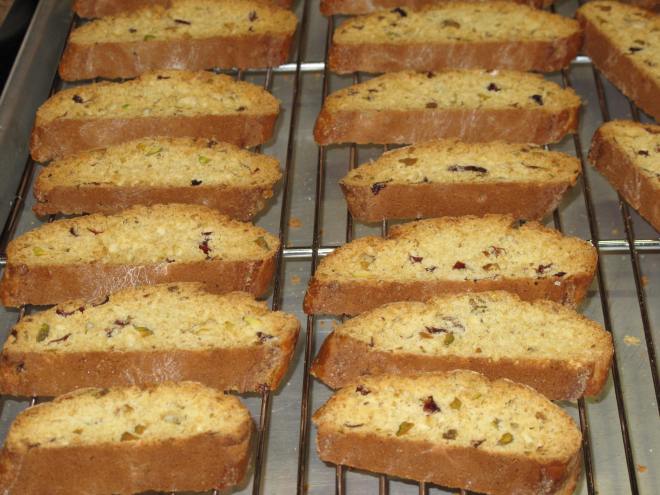
This is a batch of biscotti, which is technically not a cookie at all, but rather a biscuit. However, it has always been part of my Christmas cookie baking timeline whenever the mood hits me to bake Christmas cookies. Did you know that biscotti is the plural form of biscotto? The word biscotto originates from the medieval Latin word biscoctus, meaning twice-cooked/baked. So there you have the secret of making a batch of biscotti. You make two long loaves of dough, bake them, let them cool a little and then slice them and bake them again. The second bake actually hardens them up a little so that they last a little while longer than a normal cookie does. Their hardness also makes it a favorite for dipping into coffee or tea.
That’s another reason I make them. The holidays at our house see a lot of coffee that is drank on a daily basis. I find it amazing that the people who are older and have the weaker kidneys are usually the ones that ask for the most coffee to drink and a little something to nibble on while drinking. I have not done a scientific test on this factoid as of yet, but I know it would fall out as a solid statement if I did. For each cup poured, many times there is the question “What do you have to dip into this coffee?” Many times they ask this by calling my name and, more than a few times, my name is forgotten and a simple “Hey you!” starts out the request.
The biscotti recipe I always make is filled with cranberries and pistachios. When you look down at the sides of the biscotti, there are little flecks of red (the cranberries) and green (the pistachio nuts). What screams holiday more than bursts of red and green? Here’s how we make the biscotti in our house:
Ingredients:
- 1/2 cup dried cranberries
- 1/2 cup boiling water
- 3 cups all-purpose flour, plus more for dusting
- 2 teaspoons baking powder
- 1/4 teaspoon salt
- 4 tablespoons unsalted butter, room temperature
- 1 cup sugar, plus more for sprinkling
- 3 large eggs, plus 1 large egg, lightly beaten
- 2 teaspoons pure vanilla extract
- 1/2 cup (2 1/2 ounces) unsalted pistachios, coarsely chopped
Directions:
Preheat oven to 375 degrees. Line a large baking sheet with parchment paper; set aside. Place cranberries in a small bowl; add boiling water. Let stand until plump, about 15 minutes. Drain, and set aside. Sift together flour, baking powder, and salt into a medium bowl; set aside.
In the bowl of an electric mixer fitted with the paddle attachment, beat butter and sugar on medium speed until light and fluffy, about 2 minutes. Add 3 eggs, one at a time, beating to incorporate after each addition and scraping down sides of bowl as needed. Beat in vanilla. Add flour mixture, and mix on low-speed until combined. Mix in cranberries and pistachios.
Turn out dough onto a lightly floured surface; divide in half. Shape each piece into a 16-by-2-inch log, and transfer to prepared baking sheet, about 3 inches apart. With the palm of your hand, flatten logs slightly. Brush beaten egg over surface of the dough logs, and sprinkle generously with sugar.
Bake, rotating sheet halfway through, until logs are slightly firm to touch, about 25 minutes. Transfer logs on parchment paper to a wire rack to cool slightly, about 20 minutes. Reduce oven temperature to 300 degrees.
Place logs on a cutting board. Using a serrated knife, cut logs crosswise on the diagonal into 1/2-inch-thick slices. Place a wire rack on a large rimmed baking sheet. Arrange slices, cut sides down, on rack. Bake until firm to touch, about 30 minutes. Remove pan from oven; let biscotti cool completely on rack. Biscotti should be kept in an airtight container.
You know you have turned out a great batch when all you hear during “coffee breaks” is the crunch, crunch, crunch of a group of folks gnawing on your cranberry-pistachio biscotti. Thanks for reading about our second cookie made for the season. There will be other posts about our Christmas baking through the big day on December 25. We hope you will come back and “bake” with us. We like the company!! What is your favorite kind of Christmas cookie?
Christmas Cookie #1 – Coconut Pyramids (No Trip To Egypt Needed)
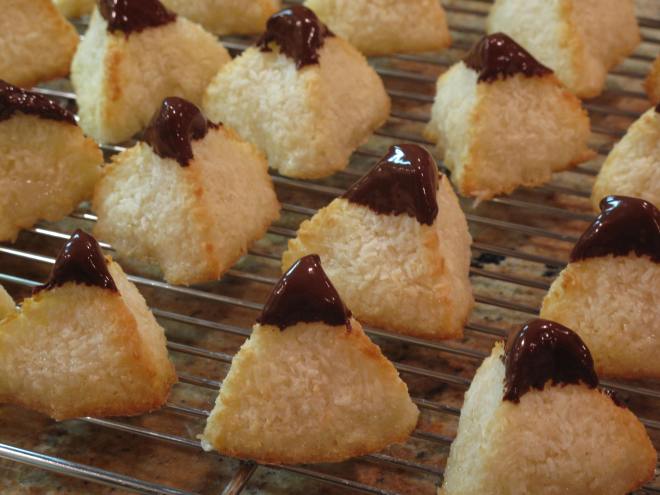
This is always the first cookie I make if and when I get into the Christmas cookie baking mode. Coconut pyramids start the season off right. Front up, I will tell you, it’s not every season I get into the mood to make Christmas cookies. When I do, these coconut pyramid macaroons are first up at bat. Why coconut macaroons you may be asking versus something more traditional for the holidays? I’m not sure I know that answer other than to say they are quick to make and bake. It’s probably a mental thing…you start off with something easy that always turns out right and then you get into a state where you start taking more challenges with more complicated recipes. Know that the hardest part of this recipe is finding unsweetened coconut. The only place I have found it is at my local health food store. I’ve used the sweetened kind of coconut from the supermarket, but it just does not work.
I first baked these macaroons in 2001 when I ran across the recipe in a cookbook I had purchased. I remember thinking that they would look like little snow drifts among the other cookies that I had baked that year. Since everyone I gave cookies to that year was really in the mood for coconut (I guess), these pyramids received a lot of compliments and I’ve been making them ever since. Coconut macaroons are light and chewy. The little tip of chocolate at the end of the cookie is a nice little touch as well. It’s the pyramid shape that I find the best part of the cookie. It looks like it takes a long time to shape them, but it is pretty quick and painless. You don’t have to make them your first Christmas cookie of the season, but do give them a shot this year. It’s always nice to start a new tradition. Why not do it with a coconut pyramid?
Ingredients:
- 1 3/4 cups sugar
- 5 1/4 cups unsweetened shredded coconut (I find mine at a local health food store)
- 7 large egg whites
- 1 pinch salt
- 2 tablespoons unsalted butter, melted
- 1 teaspoon pure almond extract
- 1 teaspoon pure vanilla extract
- 4 ounces semisweet chocolate
- 1/2 teaspoon pure vegetable shortening
Directions:
Heat oven to 350 degrees. Line a baking sheet with parchment. In a large bowl, mix together sugar, coconut, egg whites and salt. Add butter and extracts and combine well. Refrigerate for at least 1 hour.
Moisten palms of hands with cold water. Roll 1 tablespoon of the coconut mixture in palms, squeezing tightly together 2 or 3 times to form a compact ball. Place ball on a clean surface and, using a spatula, flatten one side at a time to form a pyramid shape.
Place pyramids on the prepared baking sheet about 1 inch apart and bake until edges are golden brown, about 15 minutes. Leave on baking sheet on a wire rack to cool completely.
Place chocolate and shortening in a small heat-proof bowl and set over a pan of simmering water; stir occasionally until melted. Dip top 1/2 inch of each pyramid in the melted chocolate. Set each dipped macaroon on cooled baking sheet to allow chocolate to harden.
For some reason, my friends, family and I find it hard to eat just one of these cookies at any given sitting. They go pretty fast, so be prepared. I’ll be posting a few more Christmas cookie favorites over the next couple of weeks. I’m in the mood to bake them this year, so why not share the recipes with the masses. Enjoy!! What is your favorite cookie that you make for the holidays?
Deja Vu Spinach And A SARA Garden Confession
This is another story here on Acorns On Glen about planting spinach. It’s a deja vu spinach story because I wrote about planting spinach in the Fall and harvesting it in early Spring during the beginning months after creation of this blog. The only thing that is different in this story is the location of where I planted the new Fall crop of spinach. I also hope that the harvesting of our early Spring spinach will be a new twist as well. To be totally honest, I hope that my harvest of any vegetables will make it to the pages of Acorns On Glen. If you review past posts, you will read a lot about planting and initial sprouting, but not anything on end-state harvesting other than a vegetable here or there. Why? Well as they say in real estate, location is everything, and so is the plot you use to build your raised bed gardens.
The trouble started in the late Fall of 2010, when I decided to have some local carpenters help me build my first raised bed garden. I remember walking through the woods outside of our fenced in back yard and finding a spot that was clear of trees and absolutely had the bright sun hitting it for a good part of the day. The garden was built over a few days and we actually used skinny trunks of trees to hold up the metal fencing that we used to keep the deer out of the garden. Everything sounds great so far, right? Yes, they were well laid plans except for one key element. The trees surrounding the clearing in the forest which borders our house did not have leaves on their branches during my Fall scouting adventure. So, of course there would be lots of sun shining throughout the day. What I didn’t plan into the equation was that when the trees had their leaves return in Spring, that those leaves would block off a majority of sunlight through each and every day until they fell off again during Fall! In other words, what I had built was a very expensive shade garden!
At first, when I realized that there were only a few hours of direct sunlight, I was in shock and really unable to process this new fact. It had to be something else! I sent a soil sample to my local agricultural extension, but found that I had really fertile soil. Then I thought it was bad seeds, but maybe one pack could be bad, but 20-30 packs? No way. It was time to man up and face this little mistake.
Thinking back on it, I exhibited all of the signs described in the SARA emotional model. Are you familiar with SARA? When a dramatic event happens in people’s lives, their emotional process in dealing with the event is often referred to as the SARA model. SARA stands for:
- Shock–I can’t believe I could make such a stupid mistake. That’s not like me! This leaves on trees thing has to be wrong.
- Anger–I am pissed that I spent so much money on a glorified shade garden! How could this happen!
- Resistance–I am going to keep planting and I know that these plants will grow. It’s just a bad planting season. This lasted most of the Summer as I planted seed after seed, plant after plant into the shaded raised beds.
- Acceptance–I am going to plant some new Fall spinach in an empty area of my flower garden in the back yard and fit in other vegetable plants there as well when it is time to plant them. It will be pretty. Now where did I lay my new book on shade gardening in raised beds?
All Spring and Summer long, I would be in my resistance mode and keep planting and planting. The seeds would sprout and grow about one inch and then that was it. The plants I grew under the grow light in my basement never really grew much more from the size they were at planting. Final result…I harvested three tomatoes, maybe a squash and a few small radishes. Everything else….you guessed it, there wasn’t anything else. So here’s to the garden of 2012. Let’s hope for a harvest (any kind of harvest) and let’s hope it starts with early Spring spinach.
There are a few areas which are fairly large in size in my flower beds in the back yard that I usually plant annuals in during early Spring. I’ve decided to use these areas for vegetables and quit with the annuals. I am going to plant vegetables in them to mix with all the great flowers and bushes that are present. For the spinach, I picked an area not far from our back door to plant it in over the weekend.
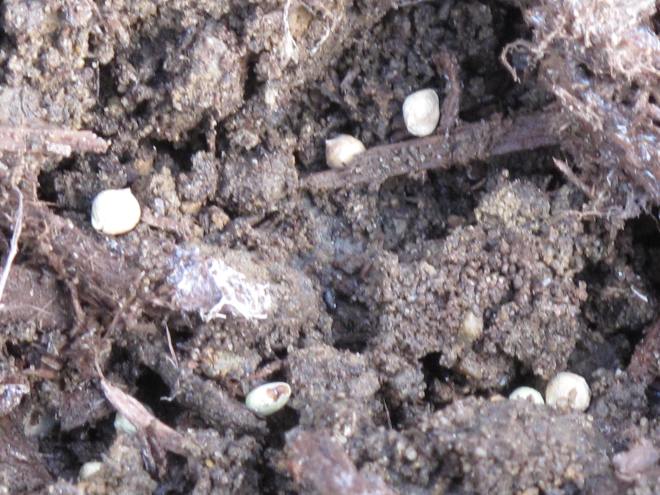
Again, I used the same spinach seed as I did a year ago: one is a traditional smooth leaf and one a savoy or curly leaf.
- ‘Space’ is the smooth-leaf variety. It has medium dark green leaves with are upright and smooth to maybe a little savoyed.
- ‘Tyee’ is the savoyed-leaf variety. It is considered the standard of savoyed spinach for its bolt resistance and vigorous growth. Dark green leaves with an upright growth habit. I was told it was ideal for over-wintering.
To protect the seeds during the harsh Winter, I again used a floating row cover pinned down by pegs to buffer the planted seeds from the elements.
Just like last year, JoJo, our Yorkie was there to oversee the gardening that was occurring. She sends her love to all.
The end result was the same instructions from last year, just in a new location and new hopes for more spinach than we can eat in the early Spring of 2012. This time around I have the seeds, the equipment and pure, bright, unfiltered sun light. This has to work!
So when you see me post something from now on about gardening, but primarily when you see me show a seed being put in the ground, please make me post the subsequent harvest. Help keep me honest and, more importantly, keep me from SARA in 2012. How was your gardening results for the 2011 season?


