Critter Alert – What Is It?

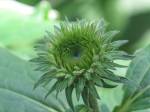
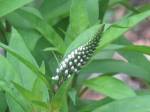
This is what I found on the granite posts that support our espalier apple trees.  What the hell is it?  A larvae of some sort with some fur or hair sticking out on the bottom.  When I saw this on the post, I almost threw up.  Again, what don’t I like?  What’s my least favorite part of living in the woods of Connecticut?  Yes, the critters.  It can be as big as a beaver or as small as a hairy larvae, but the site of something like this from nature sets me free.  I don’t really know when my critter fears began.  As a kid I was always one with nature.  I caught frogs and toads, tried to catch fish with my hands, used to watch the pheasant and quail fly around in the fields behind my house.  Something changed and all I know now is that there is no joy…there is just a rush of heat through my body as my natural instincts instruct me to run for safety.  It’s the weirdest thing.

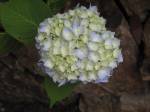
The larvae has to be related to the caterpillar I found on the other side of the post.  As a young kid, I would have grabbed the caterpillar, rubbed its furry little body and maybe put it into a jar with air holes poked into the top to watch it turn into a moth or a butterfly.  Now, I attach the telescopic lens to my camera and zoom in from across the yard to get the picture.

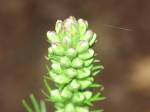
Here’s what I’m hoping.  Maybe the larvae and caterpillar have something to do with the luna moth that was stuck to the side of the house for so many days last month.  Maybe the luna gracefully flew to the granite post to leave one more generation of its beautiful family and this is what I found.  With my critter luck, I know that this caterpillar probably produced the larvae and out will come some hideous moth with fangs, a large wasp with a six-inch stinger or some strain of garden eating worm.  Let’s pray for the luna moth!

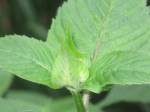
So rest assured that I will be hitting the internet this afternoon trying to figure out what is stuck to the espalier posts.  I may even go to the book store and buy a moth/butterfly book to see if I can figure out what is growing in the back.  I pray it is not something hideous so I won’t have to go out there and knock it off the post.  That would mean the neighbors would get to see another round of me screaming and running around like a crazy person.  If you know what this is, please leave me a comment.  In other words…..What is it?

Our Virtual Garden Show Continues – What’s Blooming

This is a transition period in our garden.  The spectacular blooming of the more tender plants of Spring is over and the vast majority of the gorgeous blooms are just memories now.  As we start Summer, the new wave of bloomers tend to come from more hardy plants and shrubs that are better able to take the hot temperatures and small amounts of moisture that Summer offers.  The plants of Summer are a tough bunch.  They can stand up to the brutal 100 degree days and seem to not mind too much if the raindrops are far and few between.  You can just tell by looking at them.  They actually look tougher than their Spring cousins.  Hardier and thicker, their flowers seem to stare at you and say ‘what are you looking at?’  Remember when you were growing up and the ‘tough’ kids would hang out together and taunt other kids by saying thing like ‘come over here and we’ll punch you’ or ‘what’s your problem?’ or ‘what are you looking at?’.  That’s these bloomers…the tough kids.  They know how to get along with little help from others.  They are scrappy.  They need to be to make it through July and August.  Enjoy our latest virtual garden tour and see what’s blooming on Glen Road.

When it is all said and done, we’re glad the tough kids are out there growing during the Summer.  From now until the end of August, the days get so hot that it makes it difficult to spend a large amount of time working out in the gardens.  Some light weeding, deadheading and evening watering is about all you can do without major heat stroke.  Even though we stay indoors or by the pool more, it is still a great feeling to look outside and see that you still have flowers blooming.  Raises your spirits even in the hottest of times.  What are some of your favorite Summer bloomers?

Italian Braciola From Our Own Notorious B.I.G.

This is baked ziti with a piece of Italian braciola on the side.  It was made by our own Notorious B.I.G.–our Brooklyn Italian Grandmother.  Yes, she is back and making another one of her all-time favorites.  Most Sunday dinners always include her famous sauce and meatballs/sausage, but she doesn’t always include braciola.  Her braciola takes thin slices of sirloin, adds a seasoned breadcrumb mixture along with cheese, egg and sausage and then they are rolled and secured with a wooden toothpick or cooking twine.  After lightly browning them in olive oil, they are added into her gravy (sauce) to cook along with the meatballs and sausage.  When I first met B.I.G., it was one of the first things she made and served to me.  I loved it that very first time and all the times since then during the thirteen years I have known her.  There is something so delicious about this little Italian meat dumpling that stands its own against the big pile of macaroni that always sits right beside it.  I really don’t need the pasta at all.  I could be very happy with just the braciola.  I have always wanted to learn how to make it and I have finally gotten my wish.  So here is B.I.G.’s recipe for Italian braciola–one of the best I’ve ever had.  It all starts with the same bread crumb mixture she uses in her other recipes.

Ingredients:

  • 8 – 10 thin slices of braciola meat or sirloin steak (our local butcher cuts sirloin for us)
  • 5 cloves of garlic, chopped into small pieces
  • 1 1/2 cups of seasoned bread crumbs
  • 3/4 cup of grated parmesan cheese, plus more for shredding
  • 4 thin slices of Italian sopressata, chopped (nothing is bad with a little sopressata on it)
  • 1/4 cup of finely chopped Italian parsley (I am told to tell you that it must be Italian–do not use curly)
  • 1 teaspoon salt
  • 1/2 teaspoon pepper
  • 1 Italian sausage (about 6 – 8 inches long), hot or mild (whatever you prefer) cooked in olive oil
  • 3 hard-boiled eggs
  • 1/2 cup olive oil

Directions:

Begin by preparing the Italian sausage link and the hard-boiled eggs and let them cool until they can be handled.  While they are cooling, combine the garlic, bread crumbs, cheese, sopressata, parsley, salt and pepper in a medium bowl.  Mix all ingredients until combined with each other.  Lay out meat slices and sprinkle bread crumb mixture over the top of each slice.

Next, take the cooled sausage and remove the skin.  Chop it into small bite-sized pieces and spread them on top of the meat slices as well.

  She’s back with jewelry galore.  A ring on each hand for balance.  You don’t want one hand being heavier than the other.

Do the same with the boiled eggs.  Chop the eggs into small bite-size pieces and spread them on top of the meat slices.

  Tennis (bracelet) anyone?

Finish by grating some additional parmesan cheese on the finished meat slices.

  A diamond ring, a gold ring and a gold bracelet.  The only way to shred cheese.

Carefully roll each meat slice and secure with a wooden toothpick.  You may need more than one toothpick to ensure that the inside stuffing does not come out during browning and then simmering in the gravy.

Heat the olive oil.  When hot, add each braciola and lightly brown the meat.  Continue turning until they are lightly browned on all sides.  At this point, you can continue cooking if you would like until the braciola are completely cooked and eat them on their own.  Most of the time, you will put them into your prepared gravy (sauce) after lightly browning them and let them continue cooking in the simmering gravy (sauce) until they are completely cooked through.

I have been to some of the finest Italian restaurants in the world and have quit ordering braciola because nothing compares to the braciola made by B.I.G.  I tend to find that many times the restaurants where I have ordered it bring it out with little taste.  Maybe they are scared to serve it to large numbers with too much seasoning in it or our family just loves large amounts of flavor coming from garlic, sopressata, egg, cheese and sausage?  Who knows!  However, these braciola pack a lot of flavor and taste.  I can see them being eaten on their own with a salad or a side of broccoli rabe or as part of the traditional Italian dinner with macaroni and gravy.  Whatever way you choose, you are in for a treat.  Man, our Notorious B.I.G. knows how to cook.  Did you learn to cook on your own or with the help of a relative like our Notorious B.I.G.?

Deadheading Has Nothing To Do With The Grateful Dead

This is the only nice part of deadheading in the garden.  Every once in a while, as you are cruising through the garden and cutting off spent flowers, you see the occasional moth or butterfly trying to hold on to something that was once so plush and gorgeous.  It happens every Spring.  Your garden flowers come on hard and strong.  You get such a magnificent display of color in all the blooms that open.  All the beauty makes you proud to be a gardener.  Then in a few short days for some flowers and a few short weeks for others, it is over.  The blooms wilt and die.  The dead flowers become a grim reminder that Spring is leaving.  As a gardener, you then move into the next phase of gardening and what I officially think of as the start of Summer.  The dreaded deadheading.

This was once a peony.

There are a lot of chores that a gardener needs to do during the growing cycle.  There is none that I hate more than deadheading flowers.  I like the chores that are about encouraging growth.  I hate the ones that make me deal with the dead.  There is no amount of songs on my iPhone that I can listen to that keep me motivated enough for the task of snip, snip, snipping dead flowers.  The dead flowers are everywhere and the chore never seems to end.  You can go through your entire garden and end up at your starting point and will still see dead flowers that you’ve either missed or they have died since your last trip through.  It’s depressing!

A spent allium.

So why do I do it?  Because dealing with the dead helps bring back life.  If left to their own devices, many flowers will bloom heavily for a short period of time, then set seed, thinking they’re done for the season.  Deadheading interrupts this cycle.  You’re actually fooling the plant, forcing them to send out another flush of blooms to try to complete the reproductive cycle.  The blooms in the second or third display may not be as large or as numerous as the first, but they are certainly worth the effort.  This is especially true for roses, day lilies and flowering annuals that inhabit a large section of my garden.  For the bulb population like alliums and tulips, deadheading flower and stem down to the ground helps keep the energy in the bulb versus having the bulb send it to the flower to produce seed.  Deadheading these perennials helps to strengthen the bulb for next year’s growth.

A rose that has seen better days.

So if you ever see me in my garden with a sad or bored look on my face, you will know it is deadheading that is what is bringing me down.  Please try to distract me….it won’t take much.  I know I’ll be happy when the next round of rose blooms come around, but in that moment, I would give anything to be somewhere else.  What garden chores are your least favorite? 

Lemon Lovers Unite

This is some finely chopped sage.  It is for the crust of a lemon tart that I made for dessert.  It is no secret that I don’t really like citrus flavors in the food I cook.  I’m not a big fan of  zest in anything and I don’t like to punch up any flavor with citrus juice.  When the troops were asking for something that had lemon in it, I had to think what recipes I had that at least had something in it that would interest me.  I have been reading Martha Stewart’s ‘Pies and Tarts’ and I saw this recipe for a Marbled Lemon Tart with a Sage and Cornmeal Crust.  This sounded different enough.  This was what I would make to get the lemon lovers their fix.  I was actually surprised.  A crisp crust that contained sage and cornmeal, along with lemon curd that had its bite taken down a few notches by the addition of creme fraiche.  It was pretty good.  So let’s make a lemon tart that even non-lemon heads can handle.

For the Sage-Cornmeal Crust:

Ingredients:

  • 2 1/4 cups all-purpose flour, plus more for work surface
  • 3/4 cup coarse yellow cornmeal
  • 3 tablespoons sugar
  • 1 tablespoon plus 1 teaspoon finely chopped fresh sage
  • 1 1/2 teaspoons salt
  • 1/2 teaspoon finely grated lemon zest
  • 3/4 cup (1 1/2 sticks) cold unsalted butter, cut into small pieces
  • 3 large egg yolks
  • 5 tablespoons ice water
Directions:

Pulse flour, cornmeal, sugar, sage, salt and lemon zest in a food processor until combined.  Add butter; pulse until mixture resembles coarse meal.  Whisk egg yolks and ice water in a small bowl.  With machine running, add to flour mixture through feed tube; process until dough just holds together.  Turn out dough onto a work surface.  Divide in half, and shape each portion into a disk.  Wrap in plastic, and refrigerate 30 minutes (or up to 2 days).  On a lightly floured work surface, roll out 1 disk to a 10-inch round.  Fit into a 9-inch tart pan with a removable bottom; trim edges flush with rim.  Refrigerate until firm, at least 1 hour (or up to 1 day).  Reserve remaining dough for another use (it can be frozen up to 3 months).  Preheat oven to 375 degrees.  Dock the shell by pricking the bottom of tart shell with a fork.  Bake until golden brown, about 25 minutes.  Let cool.

For the Filling:

Ingredients:

  • 1/4 teaspoon unflavored gelatin
  • 1 tablespoon cold water
  • 6 large egg yolks
  • 1 cup sugar
  • 1/4 teaspoon salt
  • 1/2 cup fresh lemon juice
  • 1/2 cup (1 stick) unsalted butter, cut into tablespoons
  • 3 tablespoons creme fraiche

Directions:

Sprinkle gelatin over cold water in a small bowl, and let stand until softened, about 5 minutes.  Whisk together egg yolks, sugar, and salt in a large heatproof bowl.  Gradually whisk in lemon juice.  Place bowl over a saucepan of simmering water, and whisk constantly until mixture has thickened and registers 160 degrees on an instant-read thermometer.  Whisk in gelatin mixture.

Remove from heat and whisk in butter, a few pieces at a time, until smooth.  Let cool, stirring occasionally.  Prepare an ice-water bath.  Place bowl of yolk mixture over bath and stir until slightly thickened, about 2 minutes.

Spread curd into crust; smooth top.  Dollop creme fraiche on top.  Using a wooden skewer or the tip of a knife, swirl creme fraiche into curd to create a marbleized effect.  Refrigerate until firm, at least 2 hours (or up to overnight).

In my rush to get the dessert out to the lemon lovers, I forgot to take a picture of the finished product so I included a copy of Martha’s so you get the feel.  While no one’s dessert can look as good as one shot by a professional photographer, mine was pretty close….let’s just say in a more ‘rustic’ way.  Given that I usually give citrus the cold shoulder, even I thought this dessert was pretty tasty and refreshing.  So when lemon is the name of the game, give them something different with a lemon tart with a marble swirl in a sage-cornmeal crust.  It’s the perfect summer treat.  What desserts do you make that contain lemons?

Apples Of My Eye

This is a very good sign.  There has been a lot of work getting the espalier apple trees in order this season.  We’ve spoiled the trees in every manner imaginable.  We started with two trees, noticed one was not doing well, removed it and replaced it with a new tree, built a support system to secure the branches and gave them a haircut.  With all this work, we have kept saying one thing.  “We better get some apples this year.”  The good news is that it appears we may be in luck this season.  The trees are producing apples for the very first time.  There aren’t a lot of apples on the trees.  Probably 20 at the most.  However, it is just nice to see your hard work pay off, especially in the garden where sometimes the harder you work results in some of your worst harvests ever.

The trouble we are facing now is how to take care of the fruit over the remainder of the Summer.  The last thing we want to do is have disease or insects take away our apples.  We try to garden in an organic fashion as much as possible.  Many of the established gardeners here in Connecticut are telling us that organic is not going to cut it as these apples continue to mature.  We will have to use some limited amounts of chemicals on them to keep them safe.  Do you have any recommendations on how to care for the apples over the Summer using the least amount of chemicals possible?

A Crisp Coconut and Chocolate Pie

This is the most uncomplicated pie we know.  We received a copy of Martha Stewart’s “Pies and Tarts” cookbook and knew that we would need to make this pie.  We love coconut and chocolate, so what could be bad in putting these two ingredients together.  However, we didn’t have a lot of time and this recipe obliged.  In keeping with our quick and tasty theme, this pie requires only four ingredients-butter, chocolate, cream and shredded coconut.  The press-in crust comes together in seconds in a food processor.  After you bake the shell, you fill it with velvety chocolate ganache, which sets to a smooth sheen.  If you decide you want something sweet and it’s a little late in the day for a big production, give this crisp coconut and chocolate pie recipe a try.  Here we go:

Ingredients:

For the crust:

  • 4 tablespoons unsalted butter, softened
  • 11 ounces (about 6 cups) sweetened shredded coconut

For the filling:

  • 1 1/4 cups heavy cream
  • 8 ounces bittersweet chocolate (preferably 61% cacao), finely chopped

Directions:

Make the crust:  Preheat the oven to 350 degrees F.  In a food processor, process butter and one-third of the coconut until mixture forms a ball, 1 to 2 minutes.  Transfer to a medium bowl.  Sprinkle remaining two-thirds coconut over mixture and combine with your fingers.

Place a 9-inch pie plate on a parchment-lined rimmed baking sheet.  Press coconut mixture into bottom and up sides of pan to form crust, leaving top edges loose and fluffy.

Place a foil ring over edge to prevent burning.  Bake until center begins to brown, 10 to 15 minutes.  Remove foil and back until edges are browned, 4 to 6 minutes more.  Transfer crust to a wire rack to cool completely.

Make the filling:  Bring cream just to a boil in a small saucepan.

Pour over chocolate in a medium heatproof bowl.

Let sit 10 minutes, then stir until chocolate is completely melted and mixture is combined.  Pour into coconut crust.  Refrigerate until filling is set, 1 hour or up to 1 day.

There you have it:  ready, set, eat.  It sort of reminded us of a deconstructed chocolate macaroon.  It was the perfect match to our simple supper of salad, breaded chicken cutlets and whole wheat linguine aglio e olio.  Nothing fancy and time consuming–just a quick mix of chocolate and coconut.  Life is good.  What do you use when you need dessert in a jiffy?